Experiencing that cinematic thrill right in your living room can be truly exhilarating. A key element to recreating this movie theatre atmosphere is wall mounting your TV. Not only does it save considerable floor space, but it also provides an uncluttered, modern look to your room. However, it’s not as simple as hammering in a few nails and hanging up a painting. Wall mounting a TV involves several crucial steps and careful considerations to ensure a safe, secure, and optimal viewing experience.
Choosing The Right TV Wall Mount
Before you start measuring the wall and drilling holes, the first step is to choose the right TV wall mount. This choice depends on many factors, including the size and weight of your TV, as well as your viewing preferences.
TV mounts come in various types: fixed, tilting, and full-motion. A fixed mount is the simplest and most affordable, but as the name suggests, it doesn’t allow any adjustments after installation. A tilting mount, on the other hand, lets you change the vertical angle of the TV, which can be helpful in reducing glare. Meanwhile, a full-motion mount offers the highest flexibility, enabling you to adjust the TV in multiple directions. However, this type is also the most complex to install.
Regardless of the type, you must ensure that the mount supports your TV’s weight and VESA (Video Electronics Standards Association) mounting pattern. VESA standards define the distance between the four mounting holes on the back of a flat-screen TV. Not all mounts are compatible with all VESA patterns, so it’s crucial to check this before making your purchase.
Deciding On The Perfect Location And Height
Once you’ve chosen the right mount, the next step is to decide where and at what height to install it. This decision is crucial not only for the aesthetics of your room but also for comfortable and healthy viewing.

While the exact location will depend on the layout of your room, there are a few guidelines you can follow. Firstly, avoid areas with direct sunlight, as the glare can interfere with your screen visibility. Secondly, keep the TV away from heat sources like fireplaces or radiators, as excessive heat can damage it.
As for the height, a common rule of thumb is that the center of the TV should be at eye level when you’re seated. This height ensures a comfortable viewing angle and prevents neck strain. However, this could vary based on personal comfort and the size of the TV. It’s a good idea to have someone hold the TV at various heights, so you can find the one that feels the most comfortable.
Remember, wall mounting a TV is not a small project. But with careful planning and the right tools, you can transform your viewing experience. Whether you’re a sports fan, a movie buff, or a video game enthusiast, a well-mounted TV can take your enjoyment to a whole new level.
Locating Wall Studs For Secure Mounting
When mounting a TV on the wall, it’s paramount to ensure the mount is attached securely. This is why we need to find the wall studs. These are the sturdy wooden beams behind your wall that provide the perfect support for your TV mount.
Imagine you’re hanging a heavy picture. You wouldn’t want it to fall off the wall, would you? The same applies to your TV. Ensuring the mount is firmly anchored to the wall studs is crucial for the safety of your TV and everyone around it.
To locate these studs, you’ll need a tool called a stud finder. This nifty little device detects changes in the wall’s density, helping you identify where the studs are. Once you’ve found the studs, mark their location with a pencil or painters tape. This will be your guide when it’s time to drill.
Marking & Drilling Pilot Holes
Now that you’ve located and marked the studs, the next step is to mark and drill the pilot holes. These holes are where the screws or bolts for the wall mount will go. But don’t worry, this isn’t as daunting as it sounds!
First, hold the wall mount bracket up against the wall, aligning the mounting holes with the stud marks. Make sure it’s level – you don’t want a crooked TV! Once it’s perfectly aligned, mark the exact spots where you’ll be drilling.
Next, choose a drill bit that’s slightly smaller than the screws or bolts you’ll be using. This will ensure a tight fit. Now it’s time to drill your pilot holes. Remember, if your wall is made of brick or masonry, you’ll need to use special anchors and tools.
Attaching The Wall Mount Bracket
With the pilot holes drilled and ready, it’s time to attach the wall mount bracket. This is the part that will be directly attached to your wall and will hold the weight of your TV.
Line up the bracket with the pilot holes, and use bolts or lag screws to secure it to the wall. If your wall is made of wood, these screws will go directly into the studs for maximum support. At first, leave the bolts slightly loose. This will allow you to adjust the bracket if needed.
Once the bracket is level and positioned correctly, fully tighten the bolts. This step is crucial, as it ensures the mount is secure and ready to support your TV. Remember, safety first!
And there you have it! You’ve successfully located the studs, drilled the pilot holes, and attached the wall mount bracket. You’re now one step closer to enjoying your favorite shows on your newly wall-mounted TV. Stay tuned for the next steps in the process: securing the mounting plate to the TV, hanging the TV on the wall mount, and concealing the cables for a clean look.
Securing The Mounting Plate To The TV
After successfully attaching the bracket to the wall, the next step is anchoring the mounting plate to your TV. This plate acts as a bridge between your TV and the wall mount, ensuring a secure connection. But how do we attach it?
First, locate the mounting holes on the back of your TV. These holes are specifically designed for mounting purposes, complying with the VESA standards mentioned earlier. Now, attach the mounting arms or plate to the TV using the screws supplied with your wall mount. Ensure the plate is centered and secure. It’s crucial to double-check this step, as the plate holds your TV and connects it to the mount. If it’s not fastened tightly, your TV may not be secure.
Hanging The Tv On The Wall Mount
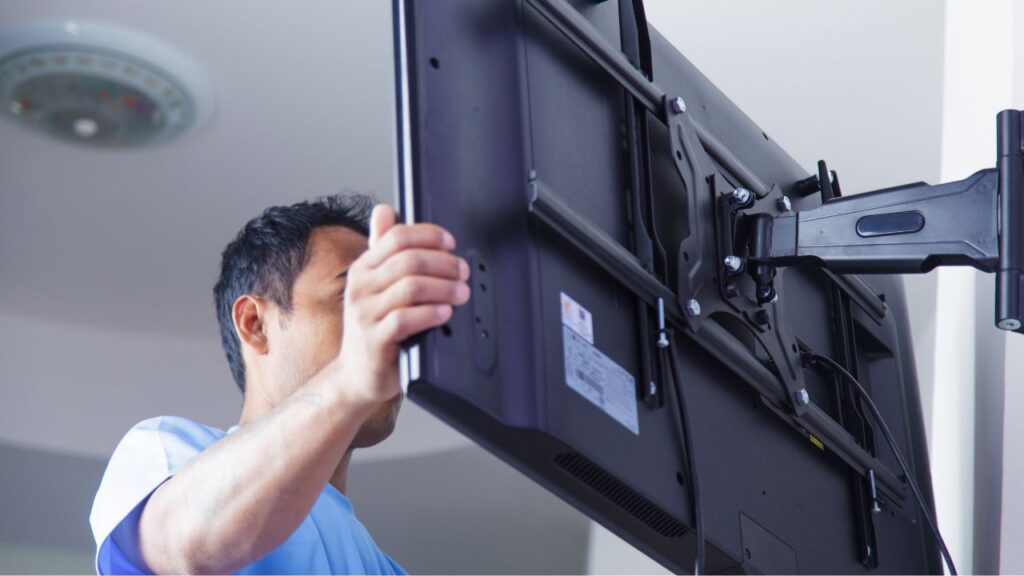
With the mounting plate securely attached to your TV, it’s time for the moment of truth – hanging the TV on the wall mount. This can be a daunting task, especially if you’re dealing with a larger TV. It’s often a two-person job, so don’t hesitate to ask for help.
As you lift the TV, align the mounting plate or arms with the wall bracket. Once aligned, gently hook the TV onto the bracket. Now, check whether your TV is leveled. If there’s a locking mechanism on your mount, make sure to secure it. This prevents your TV from detaching from the bracket. Remember to handle the TV with care during this process, as any mishandling could potentially damage your TV or cause injury.
Concealing Cables For A Clean Look
Now that your TV is safely hanging on the wall, you’re almost done. But there’s one more step to achieve that clean, clutter-free look – concealing your cables. Loose, dangling cables can be unsightly and can detract from your sleek, wall-mounted TV. Plus, neatly organized cables are easier to manage and less likely to get tangled or damaged.
There are a few options for cable management. You can use cable covers that match your wall color to hide the cables running down from your TV. Alternatively, if you’re comfortable with more advanced DIY, you can run the cables through the wall for an even cleaner look. Whatever method you choose, the goal is the same – to make the cables as inconspicuous as possible.
Conclusion
Congratulations! You’ve successfully wall-mounted your TV. It may have been a bit challenging, but the result is worth it. Now you can enjoy your favorite shows and movies on a screen that’s perfectly positioned for comfort and style.
But before we wrap up, let’s revisit some essential safety tips. Always ensure that the mount is securely attached to the studs in the wall. Check and double-check all screws and bolts are tightened, and the mount is level before hanging the TV. If you’re unsure about any step, don’t hesitate to consult a professional. Remember, safety should always be your top priority.
With these tips, you’re well-equipped to mount your TV on the wall. Enjoy your new, cinema-like viewing experience!


