Is your bathroom looking a bit outdated or do you fancy a change in decor without breaking the bank? One simple yet effective solution could be to paint your bathroom cabinets. It’s a task you can undertake yourself, without needing extensive DIY skills. You’d be surprised at the transformation this small change can make, giving your bathroom a fresh, modern look.
Why Paint Bathroom Cabinets?
Before we move on to the how, let’s discuss the why. Why paint your bathroom cabinets? Well, there are several good reasons. For one, it’s cost-effective. Replacing your cabinets can be expensive, but a fresh coat of paint can give them a new lease of life. It’s also a great way to inject your personal style into the room and make it feel more like you.
However, there are a few things you need to consider. Bathrooms tend to be humid places, so you’ll need to choose a paint that can withstand this environment. It’s also important to remember that this isn’t a quick job – to do it properly, you’ll need to take the time to prepare your cabinets and apply the paint correctly.
Tools & Materials Needed
Before you get started, you’ll need to gather a few tools and materials. This includes:
- Paint: As we mentioned earlier, you’ll need a paint that can withstand a humid environment. Look for options that are designed for high-moisture areas, such as acrylic enamel or alkyd paints.
- Primer: A good primer is crucial as it will help your paint adhere to the cabinets. Shellac or oil-based primers are recommended due to their moisture resistance and flexibility.
- Sandpaper: You’ll need to sand your cabinets before applying the primer, so you’ll need some 220-grit sandpaper. Sanding helps the primer and paint adhere, especially if your cabinets have a glossy finish.
- Brushes and Rollers: Brushes are useful for painting edges and details, while rollers are good for larger flat surfaces. A small foam roller is a good choice for this task.
- Cleaners and Degreasers: Before you start painting, you’ll need to clean your cabinets thoroughly. A simple solution of water and degreasing dish soap can work well.
- Painter’s Tape: This will help protect the areas around your cabinets, such as your walls and countertops, from getting painted accidentally.
While this might seem like a long list, many of these items are likely things you already have around your house. And remember, the better prepared you are, the smoother the painting process will be.
Preparing Your Bathroom Cabinets For Painting
Before you can start painting, you need to prepare your bathroom cabinets. This step might seem tedious, but it’s a critical part of the process. Proper preparation can be the difference between a smooth, professional-looking finish and a job that looks amateurish.
Start by removing all the hardware from your cabinets. This includes handles, knobs, and hinges. If you can, take off the cabinet doors and drawers as well. It will be much easier to paint them if they’re lying flat. Plus, you can get better coverage and avoid the risk of drips.
Once you’ve removed all the hardware and doors, it’s time to clean your cabinets thoroughly. You might be surprised at how much dirt and grime can accumulate on these surfaces. Use a solution of water and degreasing dish soap to wash away any contaminants. After cleaning, rinse with clean water and let the cabinets dry completely.
The final step in preparing your cabinets for painting is to fill any holes or scratches with wood filler. If you’re planning on changing the placement of your handles or knobs, now’s the time to fill in the old holes. Let the filler dry, then sand the areas smooth.
Cleaning & Sanding:
Cleaning and sanding are two steps you don’t want to skip when painting your bathroom cabinets. After you’ve filled in any imperfections, it’s time to sand all the surfaces that you plan to paint. This includes the frame of the cabinet, the doors, and the drawers.
Why sand? Sanding helps the primer and paint adhere to the cabinets, especially if they have a glossy finish. Use 220-grit sandpaper and lightly sand all surfaces. Don’t forget to vacuum up the dust and wipe the surfaces with a microfiber cloth when you’re done. For extra assurance of good paint adhesion, you can also use a liquid deglosser.
After sanding, protect the surrounding areas from paint by applying painter’s tape. This includes the walls, floor, and vanity countertop edges. Painter’s tape is your best friend in this project – it helps ensure clean lines and protects surfaces from accidental paint drips.
Priming The Cabinets: Choosing The Right Primer
Once your cabinets are clean, sanded, and ready, it’s time to prime them. The primer is a crucial step in the painting process. It helps the paint adhere better to the surface, provides additional protection, and can help minimize brush marks.
For bathroom cabinets, choose a shellac or oil-based primer. These types of primer offer the best moisture resistance and flexibility. Shellac primers also work well with both oil- and water-based paints, making them a versatile choice.
Apply the primer with a brush for edges and details, and a small roller for larger flat surfaces. If you’re painting the doors and drawers, start with those so they can dry while you work on the frame. Allow the primer to dry fully before you proceed to the next step. This usually takes 2-3 hours, but check the instructions on the primer can to be sure.
After the primer is dry, lightly sand the cabinets again with 220-grit sandpaper for a smooth finish. Wipe away any dust and you’re ready to start painting!
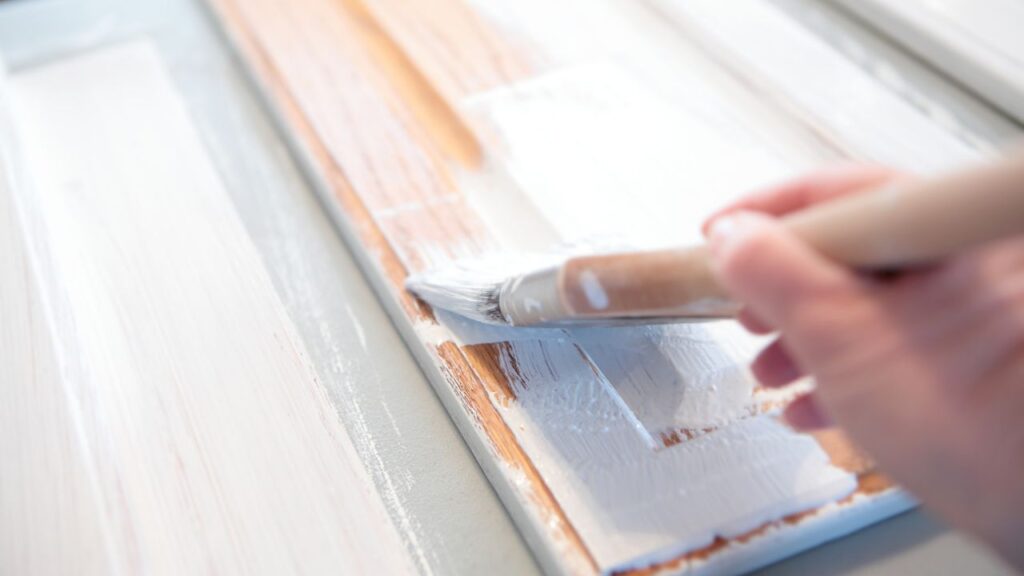
Painting Techniques For Bathroom Cabinets
Once your bathroom cabinets are thoroughly cleaned, sanded, and primed, we’re ready for the fun part – painting. Using the right technique and tools can make a significant difference in the final outcome. Your primary tools will be brushes and rollers, each having its specific use.
Brushes are perfect for painting edges and details. Quality brushes can provide excellent coverage and leave fewer visible brush strokes. Look for brushes with synthetic bristles as they work particularly well with acrylic paints. Alternatively, foam brushes can be a good option for hard-to-reach areas and intricate designs.
For larger flat surfaces, a small foam roller is your best bet. Rollers apply paint more quickly than brushes and can give a smoother finish with fewer visible brush strokes. Moreover, foam rollers are less likely to leave behind lint or texture in the paint.
Regardless of the tool you use, remember to apply paint in thin, even coats. This technique helps to prevent drips and gives a smoother finish. You’ll typically need at least two coats of paint, but a third coat may be necessary for complete coverage.
Tips For Achieving A Professional Finish
So, how can you ensure your painted cabinets look like they were done by a professional? Here are a few tips.
First, always sand between coats. This step helps to smooth out any brush strokes and gives the next coat something to grip onto. Use 220-grit sandpaper, and don’t forget to wipe away the dust afterward.
Second, be patient and let each coat dry completely before applying the next. If the previous layer isn’t dry, the next coat may not adhere well, leading to peeling or chipping paint.
Lastly, work in a well-ventilated area, especially if you’re using oil-based products. Good ventilation helps the paint to dry faster and reduces your exposure to potentially harmful fumes.
Reassembling & Final Touches
After you’ve applied the final coat of paint, you’ll need to wait for it to dry fully before reassembling your cabinets. The drying time can vary based on the type of paint you used, so always check the instructions on the paint can.
Once the paint is dry, you can reattach the hardware, doors, and drawers. Be careful not to scratch your fresh paint job during this process. If you’re considering changing the hardware, now is the perfect time. New hardware can give your cabinets an updated look and complement your new paint color.
Remember, freshly painted cabinets will need a few days to fully harden. Try to avoid heavy use or vigorous cleaning during this time. Once the paint has hardened, your cabinets will be more resistant to chips and scratches.