Have you ever wondered why it’s necessary to paint your shed? Well, the answer is simple. Not only is it crucial for enhancing curb appeal, but it also safeguards the shed from harsh weather conditions. When we paint our sheds, we give them a protective layer that helps prevent damage from rain, snow, and the sun’s harmful UV rays. Paint can also prevent the wood from rotting, which is a common issue in damp climates.
Moreover, painting your shed is a great way to inject a bit of personality into your outdoor space. You can choose from a wide range of colors and finishes that suit your style. It’s an easy and cost-effective way to transform your backyard. In short, a fresh coat of paint can breathe new life into your old shed and make it look brand new!
Gathering Your Tools & Materials
Before you start painting, it’s essential to gather all the necessary tools and materials. This ensures a smooth painting process and saves you from unnecessary interruptions. Here’s a simple checklist to help you out:
- Paint: You’ll need an exterior-grade paint that’s suitable for the shed material. Acrylic-based paint works well for wooden sheds, while oil-based spray paint is ideal for metal sheds.
- Primer: A good quality primer is crucial because it helps the paint adhere better to the surface. For wooden sheds, opt for an exterior wood primer, and for metal sheds, a rust-inhibiting primer is ideal.
- Brushes and Rollers: For detailed work or small sheds, brushes and rollers are perfect. If you’re painting a larger shed, consider using a paint sprayer for quicker coverage and a smoother finish.
- Cleaning and Sanding Tools: A pressure washer or scrub brush will be needed to clean the shed, and sandpaper or a sanding block to smooth out rough areas.
- Painter’s Tape and Masking Materials: These protect the areas that you don’t want to get painted, like windows or trim.
Gathering all these tools and materials in advance will save you time and help you stay organized during the painting process.
Preparing Your Shed For Painting
Proper preparation is the key to a successful paint job. It ensures that the paint adheres well to the surface and lasts longer. Here’s how to prepare your shed for painting:
Step 1: Remove Hardware and Accessories
Start by removing all hardware, light fixtures, and accessories from the shed exterior. This prevents them from getting damaged or painted on.
Step 2: Clean the Shed
Use a pressure washer or scrub brush to clean the shed thoroughly. This will remove dirt, cobwebs, and old paint flakes. Make sure to let the shed dry completely before you start painting. This drying process can take a few hours to several days, depending on the weather and the shed material.
Step 3: Sand the Surface
Next, it’s time to sand the surface. If you have a wooden shed, scrape away any loose paint and sand rough areas until they are smooth. For metal sheds, remove rust with a wire brush and sand any glossy areas. This will help to improve the paint’s adhesion.
Step 4: Protect Areas Not to be Painted
Use painter’s tape or masking materials to cover the areas that you don’t want to be painted. This includes windows, trim, hardware, and any other elements that you want to protect from the paint.
Remember, skipping or rushing through the preparation process can result in a less-than-perfect paint job. So, it’s worth taking the time to prepare your shed properly for the best results.
Cleaning & Sanding The Shed Surface
Once you have gathered your tools and materials, it’s time to get your hands dirty. First things first, cleaning and sanding the shed surface is crucial. This might seem like a tedious task, but it’s a step you cannot afford to skip.
Start by removing all hardware, light fixtures, and accessories from the shed exterior. This prevents them from getting damaged or painted on. Once your shed is free from these items, begin the cleaning process. Use a pressure washer or a scrub brush to clean the shed thoroughly. This will help remove any dirt, cobwebs, and old paint flakes that might hinder the painting process. Remember, a clean surface is essential for the paint to adhere properly.
After cleaning, let the shed dry completely. This drying process can take anywhere from a few hours to several days, depending on the weather and the shed material. Patience is key here!
Once the shed is dry, it’s time to sand the surface. If you have a wooden shed, use sandpaper or a sanding block to smooth out any rough areas. Scraping away loose paint and smoothing rough patches will ensure that the new layer of paint sticks well. For metal sheds, use a wire brush to remove rust and sand any glossy areas to improve the paint’s adhesion.
Priming The Shed
After cleaning and sanding comes another vital step: priming. A primer creates a smooth and uniform surface for your paint, ensuring that it adheres better and lasts longer.
If your shed is made of bare wood or if it has undergone major repairs, an exterior wood primer is what you need. This step improves the paint’s coverage, vibrancy, and durability. For metal sheds with any exposed bare metal, a rust-inhibiting primer is ideal.
To apply the primer, use a brush or roller, starting from the top and working your way down. Make sure you let each coat dry as directed on the primer can before applying another coat. This step might take some time, but it’s worth it for the quality finish it provides.
Choosing The Right Paint For Your Shed
Now that your shed is clean, sanded, and primed, it’s time to choose your paint. This is where you can let your personality shine through! The color and finish you choose can transform your shed from a functional storage space into a beautiful addition to your backyard.
If you have a wooden shed, an acrylic-based exterior paint is just the right choice. It’s durable, provides excellent coverage, and comes in a variety of colors and finishes. For metal sheds, opt for oil-based spray paint. It adheres well to metal surfaces and resists rust.
When choosing paint, consider the shed’s environment. Light colors reflect heat and are less likely to fade in the sun, making them ideal for sunny climates. Dark colors absorb heat and can help keep a shed warm in cold climates. But remember, the most important thing is that you love the color, as you’ll be living with it for a long time!
By carefully cleaning, sanding, priming, and choosing the right paint for your shed, you’re setting the stage for a successful painting project. The effort you put into these steps will pay off in a beautiful, long-lasting finish that enhances your backyard and protects your shed for years to come.
Painting Techniques: Brushes, Rollers, & Sprayers
Choosing the right painting tool for your shed is crucial. The choice depends on the size of your shed and your comfort level with the tool. Let’s discuss the three most common painting tools and their benefits.
Brushes: Brushes are great for detailed work. They allow you to control the amount of paint you apply, making them ideal for painting trim and corners. Brushes are also perfect for smaller sheds where precision is more important than speed.
Rollers: Rollers cover large surfaces quickly and efficiently. They are ideal for painting the main body of the shed, especially if it’s larger. Rollers create a smooth finish with less visible brush strokes compared to brushes.
Sprayers: Paint sprayers are the fastest method of painting. They are perfect for larger sheds or if you want to finish the job quickly. However, they require more skill to use effectively. Sprayers can also create a lot of overspray, so you’ll need to cover any nearby areas to protect them from paint.
Regardless of the tool you choose, remember to start from the top and work your way down. This method helps prevent visible drips and gives a smoother finish. Always follow the manufacturer’s instructions for the best results.
Finishing Touches: Painting Trim & Doors
The finishing touches can make a huge difference to the overall appearance of your painted shed. Painting the trim and doors in a contrasting or matching color can add character and style to your shed.
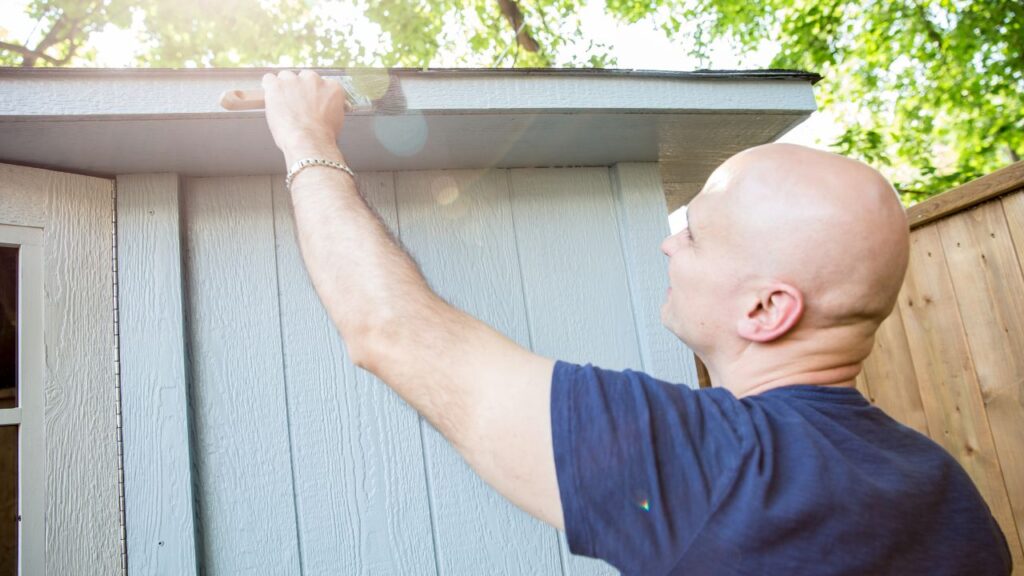
When painting the trim, use a smaller brush for precision. Carefully paint the edges, making sure not to overlap onto the main body of the shed. Remember, patience is key to a professional-looking finish.
If you’re painting doors, remove them from the hinges for easier access. Paint them flat to prevent drips and runs, and remember to paint all edges for a uniform look. Once the paint is completely dry, reattach the doors.
Maintenance Tips For A Long-Lasting Finish
A well-maintained paint job can last for many years. Here are some tips to keep your shed looking its best:
- Regular Clean: Clean your shed regularly to prevent dirt and grime buildup. This helps maintain the paint’s brightness and prevents damage.
- Touch Ups: Touch up any chips or scratches as soon as you notice them. This prevents the wood from being exposed and helps maintain the shed’s appearance.
- Regular Inspections: Inspect your shed regularly, especially after harsh weather. Look for any signs of peeling or blistering paint that may need attention.
By following these maintenance tips, your shed’s paint job can remain vibrant and protective for years to come.