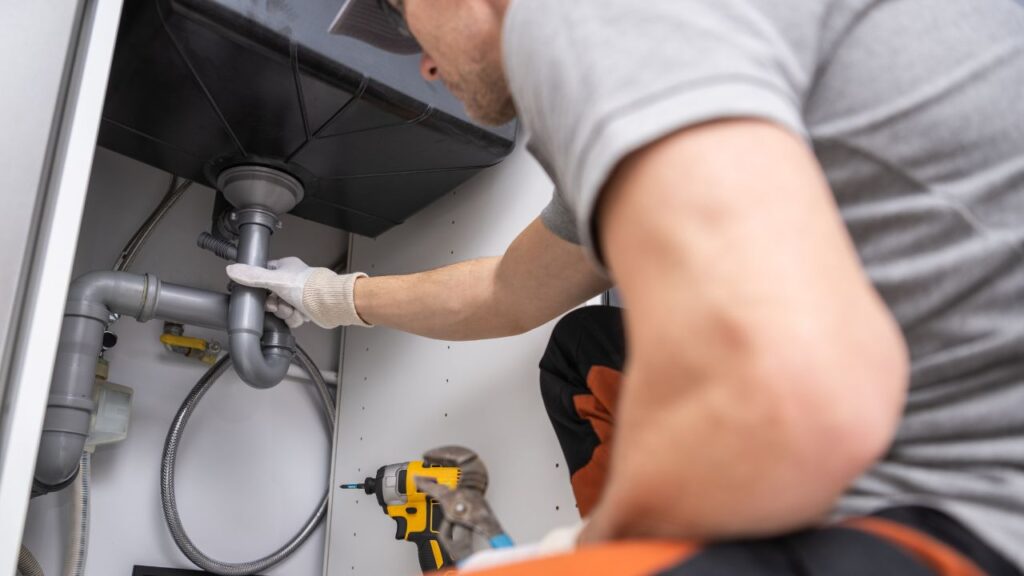
Doing home improvements on your own can be both cost-effective and gratifying. One such task that you can tackle is installing a kitchen sink drain. While it may seem like a daunting task, with the right tools and a step-by-step guide, you can do it yourself. So, let’s get started on how you can install a kitchen sink drain.
Tools & Materials Needed For Installing A Kitchen Sink Drain
Before you begin, gather all the required tools and materials. This way, you can ensure a smooth installation process without any interruptions. Here’s what you’ll need:
- Sink drain strainer kit: This kit includes a basket strainer which you’ll need for the installation process.
- Plumber’s putty: You’ll use this to seal the drain flange for a watertight fit.
- Slip-joint pliers or a sink drain wrench: These tools will help you tighten the parts of the drain assembly.
- Rubber gasket and friction ring: These are usually included in the strainer kit. The gasket provides a seal, while the friction ring helps prevent leaks.
- Tailpiece and PVC drain pipes: The tailpiece connects to the rest of the plumbing and the PVC drain pipes carry the water away.
- Towels or bucket: These are for catching any residual water while you work.
Preparing Your Sink For Installation
Before you start installing your kitchen sink drain, you need to prepare the sink. This step is crucial as it ensures that the new drain fits perfectly and works as it should. Follow these steps to prepare your sink for the new drain installation:
Remove the existing drain assembly: The first step is to remove any existing drain assembly from your sink. This includes the strainer, locknut, and rubber gasket. Use your slip-joint pliers or sink drain wrench for this task. Be careful not to damage your sink while doing this.
Clean the sink opening: Once you’ve removed the existing drain assembly, clean the sink opening thoroughly. This step is vital to ensure a good seal for the new strainer. Use a non-abrasive cleaner and a soft cloth to clean the area. Make sure you remove any residue or build-up that can interfere with the installation of the new drain.
Have all necessary parts on hand: Before you start the installation, make sure you have all the necessary parts on hand. This includes the strainer, rubber gasket, friction washer/ring, locknut, and tailpiece. Having everything within reach will make the installation process easier and faster.
Now that you have all the materials and your sink is ready, you’re set to start installing your new kitchen sink drain. In the next section, we’ll guide you through the process of assembling the drain flange, installing the gasket and washer, and connecting the drain tailpiece and pipes.
Step-by-Step Guide To Assembling The Drain Flange

Let’s kick things off with the assembly of the drain flange. Get your plumber’s putty ready. Roll a small amount of it into a shape that resembles a snake. Next, place it around the underside edge of the drain flange. This is the part that sits snugly on the sink inside the basin. Once that’s done, set the strainer into the sink’s drain opening. Apply a bit of pressure so the putty spreads out and forms a seal. This seal is what helps to prevent water leaks.
Installing The Gasket & Washer
After the drain flange is in place, it’s time to install the gasket and washer. From underneath your sink, slide the rubber gasket over the threads of the drain basket. This is the part that extends beneath your sink. Then, add the friction washer. Following this, thread the large locknut onto the drain body. Tighten it up using your slip-joint pliers or a special sink drain wrench. Be careful though, you want a snug fit, but overtightening can lead to damage. It’s all about finding the right balance here.
There’s a good chance that some of the plumber’s putty you applied earlier will squeeze out around the flange inside the sink. Don’t panic, this is normal. Simply wipe this away with your finger or a cloth. Remember, it’s always better to have a little too much putty than not enough!
Connecting The Drain Tailpiece & Pipes
With the gasket and washer installed, we can now proceed to connect the drain tailpiece. What’s a tailpiece you ask? It’s the straight pipe that screws onto the threaded bottom of the installed strainer. Start by hand-tightening the tailpiece, then snug it further with pliers only if needed.
Next, you’ll want to attach the rest of the drain pipes. If you have any trap or waste arm pieces (like a P-trap), reassemble these to the tailpiece and existing drain. Be sure to tighten all slip joints firmly. But again, don’t overtighten as you could crack the fittings.
Following this step-by-step guide should make the installation process a breeze. But remember, every sink and drain kit can be a little different. Always follow the specific instructions that come with your sink or drain kit. This way, you can ensure a perfect fit and a job well done.
Testing For Leaks & Ensuring A Secure Fit
Once you’ve installed the kitchen sink drain, the next crucial step is to test for leaks. This step ensures that your installation is secure and functioning properly. Start by running a moderate flow of water from the faucet into the drain. As the water is running, carefully inspect all the joints and seals of the drain assembly. Check for any drips or seepage that might indicate a leak.
If you spot a leak, don’t panic. Often, a simple tweak can resolve the issue. If the leak is at a joint, gently tighten it a bit more. Don’t overdo it, though, as too much force can crack the fitting. If the leak persists, you might need to disassemble the joint, check the washer or gasket for proper seating, and reassemble.
Once you’ve checked all the joints and found no leaks, congratulations! You’ve successfully installed your kitchen sink drain. But the job doesn’t end here. Let’s move on to some common mistakes to avoid and maintenance tips to keep your sink drain in top shape.
Common Mistakes To Avoid During Installation
DIY projects like installing a kitchen sink drain come with a learning curve. Even so, knowing the common mistakes can save you time, effort, and frustration. First, always use plumber’s putty or the sealant specified by the manufacturer. This sealant creates a watertight seal at the drain flange, preventing leaks.
Another common oversight is forgetting the friction ring. This small piece plays a big role in preventing leaks in the drain assembly. So, make sure it’s in place before you tighten the locknut. Lastly, remember to hand-tighten first, then use tools. Overzealous use of tools can lead to damage. And always double-check your alignment before tightening everything down.
Tips For Maintaining Your Kitchen Sink Drain
Now that you’ve installed your kitchen sink drain, regular maintenance can prolong its life and keep it functioning well. Regularly clean your drain to prevent buildup of food particles, grease, and other debris. You can use a mixture of baking soda and vinegar for a natural, effective cleaner.
Also, avoid pouring oil or grease down your sink as it can solidify and clog the drain. If your drain does clog, use a plunger or a plumber’s snake to clear it, instead of harsh chemicals that can damage your pipes. Lastly, inspect your drain regularly for any signs of leaks. Early detection can prevent minor issues from becoming major problems.
Installing and maintaining a kitchen sink drain may seem intimidating, but with the right tools, instructions, and patience, it’s a task you can definitely tackle. Remember, the key to a successful DIY project is to take your time, follow the steps carefully, and learn from any mistakes.


