Installing hardwood floors on concrete might seem like a challenging task but with the right approach, it can be accomplished with relative ease. Hardwood floors add an undeniable charm and warmth to the home, and concrete subfloors, found predominantly in basements and ground floors, shouldn’t deter you from enjoying this timeless flooring choice.
Assessing The Concrete Subfloor
The first step in your hardwood floor installation journey is to assess the condition of your concrete subfloor. No one wants to lay beautiful hardwood planks on a questionable foundation, and an unprepared or damaged subfloor can lead to problems down the line, like warping or buckling of the wood.
Ensure that the concrete is level and free of cracks or damage. You can easily check for levelness using a long straightedge. If you find any low spots, they can be filled with a self-leveling compound. For any cracks or damage, a concrete patch product can be used. It’s crucial to make sure the concrete is clean, too. Any dirt or debris can interfere with the adhesive used to install the floor.
Managing Moisture Levels In Concrete Subfloors
One of the big concerns when installing hardwood floors on concrete is managing moisture levels. Concrete can often hold a surprising amount of moisture, and if it seeps into your hardwood, it can cause the wood to expand, contract, or even warp.
To determine if your concrete subfloor is dry enough for hardwood installation, you’ll need to use a moisture meter. This handy tool can provide a relatively accurate reading of the moisture content in your concrete. If the moisture content is too high, above the recommended levels, don’t panic. This doesn’t mean you can’t install hardwood floors. Instead, you may need to install a vapor barrier or retarder to protect your hardwood from the damp concrete. This step is particularly important if you plan to install solid hardwood.
Acclimating Hardwood Flooring
Once your subfloor is ready, it’s time to turn your attention to the hardwood itself. Before you install your hardwood flooring, it’s important to let the wood acclimate to the temperature and humidity of the room where it will be installed.

Why is this step important? Wood is a natural material, and it can expand and contract with changes in humidity and temperature. By acclimating your hardwood, you’re allowing it to adjust to the conditions in your home, which can help prevent future problems like gapping or buckling.
To acclimate your hardwood, simply store it in the room where it will be installed for several days prior to installation. Open the boxes and stack the planks in a crisscross pattern to allow air to circulate around the wood.
In the next part of this article, we will discuss different installation methods to lay your hardwood floors on concrete. Also, we’ll guide you through a step-by-step installation process for each method. You’ll see that with the right preparation and procedure, installing hardwood floors on concrete can be a successful project that enhances the beauty of your home. Stay tuned!
Choosing The Right Installation Method For Hardwood On Concrete
As you embark on this project, deciding on the right installation method for your hardwood floors is pivotal. This choice is influenced by factors such as the type of hardwood, the condition of the concrete subfloor, and your personal preferences. There are three primary methods to consider: the Glue-Down method, the Plywood Subfloor/Nail-Down method, and the Floating Floor method, the latter being only for engineered hardwood.
Glue-Down Method
The Glue-Down method is recognised for its application in both solid and engineered hardwood installations. This method involves the use of a manufacturer-suggested adhesive, spread evenly on the subfloor using a notched trowel. The hardwood planks are then carefully placed into the glue, ensuring tight joints for a smooth finish.
Plywood Subfloor/Nail-Down Method
The Plywood Subfloor/Nail-Down method starts with a vapor retarder over the concrete. This is followed by the installation of exterior plywood panels, providing a stable base for the hardwood. The hardwood flooring is then nailed onto the plywood, much like how you would on a traditional wooden subfloor.
Floating Floor Method For Engineered Hardwood
Last, but not least, is the Floating Floor method, exclusively used for engineered hardwood. It starts with a moisture barrier and underlayment over the concrete. The engineered flooring is then laid out, securing the tongue-and-groove joints without fastening the boards to the subfloor. This method allows for slight movement due to temperature or moisture changes.
Step-by-Step Guide To The Glue-Down Installation Method
The Glue-Down method, being one of the most common, requires a certain level of precision and care. Following these steps will help ensure a successful installation:
- Prepare the subfloor by ensuring it’s clean, level, and dry.
- Apply a manufacturer-recommended mastic or adhesive using a notched trowel, creating ridges in the glue.
- Place the hardwood planks into the glue, using floor clamps if necessary to keep joints tight until the adhesive sets.
Installing a Plywood Subfloor for Nail-Down Installation
The Plywood Subfloor/Nail-Down method is slightly more complex but provides a sturdy base for solid hardwood flooring. Here are the steps involved:
- Install a vapor retarder over the concrete.
- Lay out ¾”” exterior plywood panels over the vapor retarder, leaving expansion gaps around the perimeter and between panels.
- Secure the plywood to the slab using power-actuated fasteners.
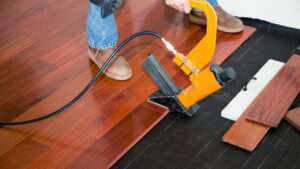
- Nail the hardwood flooring onto the plywood, ensuring it’s secure and level.
In the next part of this article, we’ll discuss the final touches to your hardwood floor installation, including sanding and finishing. We’ll also provide tips for maintaining your beautiful new floors, ensuring they add value and charm to your home for years to come.
Finishing Touches
After successfully installing your hardwood floor, it’s time to add the final touches that bring out the beauty of the wood. Sanding and finishing your floor not only enhances its appearance but also protects it from wear and tear. If you’ve opted for prefinished hardwood, you can skip this process. However, if you’ve installed unfinished hardwood, this step is crucial.
The first task is sanding. This process helps to level out any minor irregularities and prepares the floor for the finish. Remember to always sand in the direction of the wood grain to avoid scratches that can mar the appearance of your floor.
Once the sanding is complete, thoroughly clean the floor to remove any dust or debris. This ensures a smooth and clean surface for the application of the finish.
Next comes the finishing process. There are different types of finishes available, such as oil-based polyurethane, water-based polyurethane, and natural oil finish. Each has its advantages and disadvantages, so it’s essential to choose the one that best suits your needs, lifestyle, and aesthetic preferences.
Applying the finish requires care and precision. Ensure to apply it evenly and allow it to dry completely before adding any additional coats. Always follow the manufacturer’s instructions for the best results.
Tips For Maintaining Hardwood Floors Installed On Concrete
Now that your hardwood floor is installed and finished, it’s time to think about maintenance. Proper care can prolong the life of your floor, keeping it looking beautiful for years to come.
Firstly, regular cleaning is essential. Use a dust mop or vacuum to remove dirt and dust that can scratch the floor’s surface. Avoid using harsh chemicals or excessive water, as these can damage the floor’s finish.
Secondly, consider using rugs and mats in high-traffic areas to protect your floor from wear and tear. Additionally, use felt pads under furniture legs to prevent scratches.
Lastly, keep your home’s humidity levels in check. Extreme changes in humidity can cause wood to expand and contract, leading to problems like warping or gapping.
Conclusion
Installing hardwood floors on concrete may seem daunting, but with the right preparation, tools, and approach, you can create a warm and inviting space that adds value to your home.
Remember, the key to a successful installation lies in preparing the concrete subfloor, choosing the right installation method, and taking care of the finished floor. With these tips and tricks in mind, you’re well on your way to enjoying the timeless charm of hardwood floors in your home.
So, roll up your sleeves, gather your tools, and embark on this rewarding home improvement project. The beauty and durability of hardwood floors await!