Undermount sinks, as the name suggests, are sinks that are mounted underneath the countertop. This design creates a seamless look from countertop to sink, offering a chic, neat, and modern look to your bathroom or kitchen. The advantage of an undermount sink is that it gives you more countertop space and makes cleaning easier, since you can wipe crumbs and spills straight into the sink without a sink rim to obstruct the way. Now that we have an idea of what undermount sinks are, let’s look at what tools and materials you need to install one.
Tools & Materials Required For Installation
Installing an undermount sink might seem like a daunting task, but with the right tools, it becomes a manageable and even enjoyable DIY project. Here is a list of the necessary tools and materials you will need:
- Undermount sink: Choose a sink that fits your countertop space and suits your aesthetic preferences.
- Mounting clips and hardware: These are often provided with the sink. They secure the sink to the underside of the countertop.
- Silicone sealant: This is used to create a watertight seal between the sink and the countertop.
- Construction adhesive (for some mounting systems): This adhesive securely bonds the sink to the countertop.
- Clamps: These are optional and used for holding the sink in position during installation.
- Rags and denatured alcohol: These are used for cleaning any excess caulk or silicone.
- Drill: This tool is required for certain mounting systems that require drilling into the countertop.
- Helper: Installing a sink can be a two-person job, especially for heavier sinks. Having a helping hand is always beneficial.
Preparing Your Countertop For An Undermount Sink
Before you get started with the installation process, it’s important to prepare your countertop. Start by checking that your countertop is suitable for an undermount sink. Materials like granite, marble, quartz, and concrete are strong enough to support the weight of the sink.
If you’re replacing an old sink, you’ll need to remove it first. Turn off the water supply before starting the removal process to avoid any potential water damage.
Once the old sink is removed, or if you’re installing a sink on a new countertop, clean the underside of the countertop thoroughly. This is to ensure that the adhesive that you’ll be applying will adhere well to the surface. You can use a rag and denatured alcohol to clean any dust, grime, or residue.
With your tools in hand and the countertop prepared, you’re now ready to move on to the next steps of the installation process. Remember, a well-prepared workspace is key to a successful installation. So, take your time, follow the instructions, and you’ll be on your way to a beautifully installed undermount sink.
Step-by-Step Guide To Positioning The Sink
If you’re installing a sink on a new countertop, it’s easier to flip the countertop upside down. This makes the installation process more manageable. Start by centering the undermount sink over the cutout on the countertop. Mark the outline of the sink on the underside of the countertop. This is to ensure the sink will be perfectly aligned once installed. It’s crucial to verify that there’s adequate clearance around the cutout before proceeding. This will help prevent any potential issues during the installation process.
Attaching The Sink: Methods & Techniques
Once you’ve positioned the sink correctly, it’s time to attach it to the countertop. Apply a thick bead of 100% silicone sealant along the inner edge of the sink cutout. This will create a watertight seal between the sink and the countertop. Then, position the sink so that it’s centered under the cutout. Press it firmly against the countertop to ensure the sealant adheres properly.
Depending on the weight of your sink, you might need to use a clamp system or temporary supports, such as 2x4s and bar clamps, to hold the sink in place while the adhesive cures. This step is crucial to ensure the sink stays in the correct position and doesn’t shift or fall during the installation process.
Next, install the mounting clips or brackets. These are often included with the sink and are used to secure the sink to the countertop. The method of installation may vary depending on the mounting system. Some systems use epoxy to glue studs, while others may require drilling into the countertop to anchor the clips. Ensure you follow the manufacturer’s instructions for this step.
Once the mounting clips or brackets are installed, tighten them evenly. This will pull the sink tight to the counter. If any excess sealant squeezes out during this process, make sure to wipe it away promptly with a rag and denatured alcohol.
Ensuring A Watertight Seal: Applying Silicone Sealant
Ensuring a watertight seal is crucial when installing an undermount sink. A good seal will prevent water from seeping into the spaces between the sink and the countertop, which can lead to damage over time.
To achieve a watertight seal, you’ll need to apply a silicone sealant. This is typically done before the sink is attached to the countertop. The sealant should be applied along the inner edge of the sink cutout on the countertop. Make sure to apply a thick bead of sealant to ensure a good seal.
Once the sink is positioned and pressed firmly against the countertop, the sealant will create a watertight seal. Any excess sealant that squeezes out during the installation process should be wiped away promptly to ensure a clean finish.
Remember, installing an undermount sink is a careful process that requires patience and precision. But with the right tools and a step-by-step guide, you can achieve a clean, professional-looking finish that enhances the look of your kitchen or bathroom.
Curing Time & Final Adjustments
After you’ve properly attached your undermount sink to the countertop, the next phase involves waiting for the adhesive to cure. This curing time is a critical step in the installation process. After applying the silicone sealant and securing the sink with mounting clips or brackets, leave the sink untouched for at least 24 hours. This waiting period ensures the adhesive has adequate time to dry and harden, creating a strong and durable bond between the sink and the countertop.
During this curing period, it’s essential to leave any temporary supports or clamps in place to hold the sink firmly. The silicone sealant needs this time to cure fully and create a watertight seal. Removing the supports too early could cause the sink to shift or fall, leading to improper installation and potential damage.
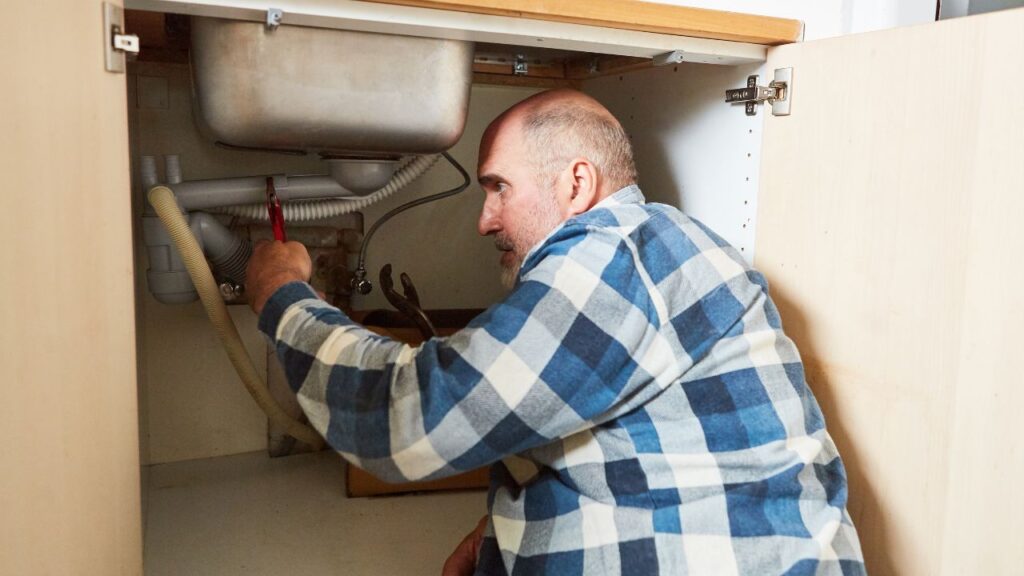
Reconnecting Plumbing & Fixtures
After the curing time has passed, and you’re confident the sink is secure, you can proceed with reconnecting the plumbing and fixtures. This step involves reinstalling or connecting the drain assembly, faucet, garbage disposal, and water supply lines. It’s always a good idea to refer to those photographs you took before disconnecting any plumbing components.
When reconnecting the plumbing, be sure to check for any leaks. Turn on the water supply and let the water run through the drain. Look for any water leaks around the water supply lines, drain, and the sink’s seal with the countertop. If you notice any leaks, turn off the water supply and tighten any loose connections. If the leak persists, you may need to reapply the silicone sealant around the sink or contact a professional plumber.
Common Mistakes To Avoid During Installation
Installing an undermount sink can be a straightforward process if done correctly. However, there are common mistakes that can occur during installation that can lead to problems down the line. One common mistake is not allowing the adhesive to cure fully. As mentioned earlier, it’s vital to give the adhesive enough time to dry and harden fully.
Another common mistake is not aligning the sink properly with the countertop cutout. This misalignment can lead to an uneven sink or issues with the plumbing connections. Always take the time to measure twice and cut once, ensuring the sink is centered and aligned with the countertop cutout.
Lastly, inadequate cleaning of the countertop surface before installation can affect the adhesive’s ability to bond with the surface. Therefore, always ensure the countertop is clean and free from any dust, grime, or residue before installation.
Conclusion
With the right tools, patience, and attention to detail, you can successfully install an undermount sink that not only looks professional but also functions well. Remember, the process may seem a bit challenging, especially if it’s your first-time, but don’t rush through it. Take your time, follow the steps carefully, and soon enough, you’ll be admiring your newly installed undermount sink.